Can you cut LED strip lighting
- Home /
- Learning Center /
- Can you cut LED strip lighting
LED Tape Lights
MaxCut COB Series

UniBasic COB Series


UniPlus COB Series


UniTape Distributors Display

Glow67 IP67 Series

UniColor COB Series


CCTPlus Tunable White

Can You Cut LED Strip Lighting? Your Complete Cutting and Customization Guide
LED strip lighting has become one of the most popular lighting solutions for both residential and commercial applications, offering flexibility, energy efficiency, and stunning visual effects. One of the most frequently asked questions about LED strip lighting is: can you cut LED strip lighting? The answer is yes—but with important conditions and proper techniques. Understanding how to cut LED strips correctly ensures successful installations and prevents costly mistakes that could render your lighting unusable.
Understanding LED Strip Lighting Construction
Before diving into cutting techniques, it’s essential to understand how LED strip lighting is constructed. This knowledge explains why you can cut strips and where those cuts can be made.
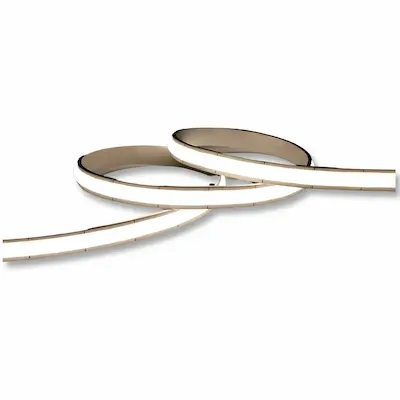
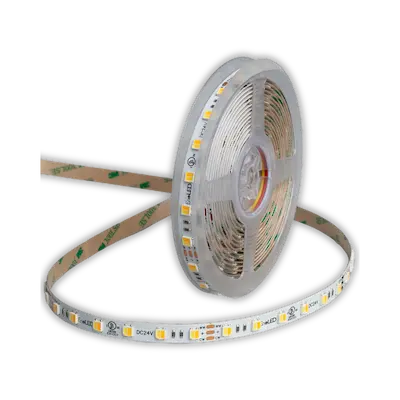
LED strip lighting consists of small light-emitting diodes mounted on a flexible printed circuit board. This circuit board typically includes an adhesive backing for easy installation and copper traces that carry electrical current to the LEDs. The LEDs are arranged in repeating segments, with each segment functioning as a complete, independent electrical circuit.
The key to LED strip customization lies in this modular design. Because the strips are constructed in repeating electrical segments, you can separate these segments at specific points without disrupting their function. However, cutting within a segment destroys that segment’s electrical integrity, creating dead LEDs that will never illuminate
Where You Can Cut LED Strip Lighting
LED strip lighting can only be cut at designated cutting points—never randomly along the strip. These cutting points are specifically designed and clearly marked by manufacturers.
Look for small scissor icons printed directly on the strip. These unmistakable symbols show exactly where you can safely cut. You’ll also see copper pads or contact points at these locations. These metallic rectangles appear every few LEDs along the strip and serve dual purposes—marking safe cutting zones and providing connection terminals for reconnecting segments.
The distance between cutting points depends on the strip’s voltage and LED configuration. Standard 12V LED strips typically allow cutting every 3 LEDs, which translates to approximately 2 inches (5 centimeters). Higher voltage 24V strips usually have cutting points every 6 LEDs, roughly 4 inches (10 centimeters) apart.
This spacing exists because LEDs are grouped into series circuits. For 12V strips, three LEDs in series create the appropriate voltage relationship for the 12V power supply. For 24V strips, six LEDs form each segment. These groupings represent the minimum functional units that can operate independently
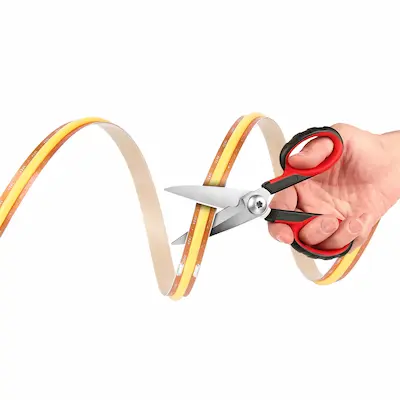
How to Cut LED Strip Lighting Properly
First, measure your installation area carefully and identify the nearest cutting point to your desired length. Since you can only cut at designated points, you may need to adjust your measurement slightly to align with a cutting mark. Always work with the LED strip disconnected from power to prevent electrical shock and protect the strip from damage.
Use sharp scissors or precision wire cutters for clean cuts. Dull blades can damage the circuit board or create jagged edges that complicate reconnection. Position your cutting tool perpendicular to the strip, centered directly on the copper pads at the designated cutting line.
Make one clean, decisive cut straight through the entire width of the strip. Avoid sawing motions or multiple cuts, as these can damage the crucial copper contact pads. Inspect the copper pads on both cut ends to ensure they remain undamaged. Clean cuts leave smooth, accessible copper pads perfect for soldering wires or attaching connectors
What Happens If You Cut in the Wrong Place
When you cut LED strip lighting between designated cutting points rather than at them, you sever the electrical pathways within an LED segment. This interruption permanently disables the LEDs in that segment. For 12V strips, cutting in the wrong place destroys at least three LEDs. For 24V strips, you lose six LEDs.
The damage is permanent and irreparable. You cannot fix LEDs damaged by improper cutting—the only solution is cutting again at the next proper cutting point, wasting the damaged section entirely
Reconnecting Cut LED Strip Lighting
Soldering Method: Soldering provides the most reliable and permanent connection between cut LED strip segments. Use a fine-tip soldering iron (25-40 watts works well), quality rosin-core solder, and appropriately sized insulated wire. Tin the copper pads first by applying a small amount of solder to each pad. Then attach wires to the positive and negative pads on each segment. Finally, connect the wires from different segments, maintaining proper polarity—positive to positive, negative to negative.
Soldered connections are waterproof when properly sealed with heat-shrink tubing, highly reliable, and ideal for permanent installations.
Connector Method: LED strip connectors offer a solderless alternative perfect for beginners or temporary installations. These devices feature spring-loaded or clamping contacts that grip the copper pads when you insert the strip.
Connectors come in various configurations. Straight connectors join strips end-to-end. L-shaped or corner connectors create 90-degree turns. T-connectors enable branching layouts. To use connectors, open the connector housing, insert the cut strip end ensuring the copper pads align with the connector’s metal contacts, and close the housing to secure the connection.
While easier than soldering, connectors are generally less reliable and may not be waterproof, making them unsuitable for outdoor or high-vibration environments
Special Considerations for Different Strip Types
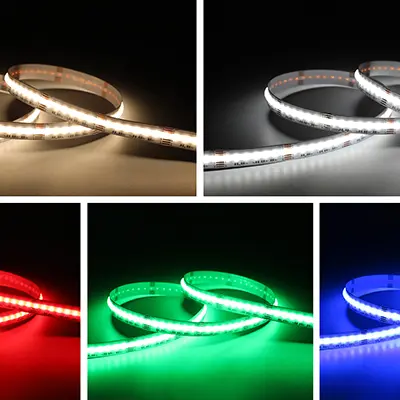
RGB Color-Changing Strips: RGB LED strips contain red, green, and blue LED chips that mix to create various colors. These strips have four copper pads at cutting points (red, green, blue, and common/ground) instead of two. You can cut at designated points just like single-color strips, but reconnecting requires managing four connections instead of two.
RGBW and RGBWW Strips: These advanced strips add dedicated white LEDs to the RGB combination, resulting in five copper pads at cutting points. The complexity increases, but the fundamental principle remains—cut only at designated points and maintain proper connections for all channels.
Waterproof LED Strip Lighting: Strips with waterproof ratings (IP65, IP67, or IP68) have silicone or plastic coating protecting them from moisture. Cutting these strips exposes the circuit board and compromises waterproofing at the cut end.
After cutting waterproof strips, you must reseal the exposed end. Options include silicone sealant applied generously over the cut end, heat-shrink tubing with adhesive lining, or specialized waterproof end caps designed for LED strips.
High-Density LED Strips: High-density strips with 120 or more LEDs per meter may have more frequent cutting points. The increased frequency provides greater flexibility in achieving exact lengths but doesn’t change the fundamental rule—you can only cut at designated points
Common Cutting Mistakes to Avoid
Many people cut LED strip lighting based purely on their measured length without considering cutting point locations. Always identify where cutting points fall relative to your measurement first, then adjust your installation plan accordingly.
Never cut LED strip lighting while it’s connected to power. Although 12V and 24V systems pose minimal shock risk, cutting energized circuits can damage the strip or create sparks.
Dull scissors or wire cutters create ragged cuts that damage copper pads. Sharp, clean cutting tools are essential for successful cuts that leave copper pads intact for future connections.
Different LED strip products from different manufacturers may have varying cutting point intervals. Never assume your new strip cuts at the same locations as a previous one.
When reconnecting segments, maintaining correct polarity is essential. LED strips have positive and negative sides, usually marked with + and – symbols. Reversed connections prevent LEDs from working, though modern strips typically include protection preventing permanent damage
Planning Your LED Strip Lighting Installation
Begin by carefully measuring your installation area, noting corners, angles, and obstacles. Sketch your layout on paper, marking where strips will run and where you’ll need cuts. Consider the total run length—most LED strips have maximum run length specifications (typically 16-32 feet) beyond which voltage drop causes dimming at the far end.
Identify how many segments you’ll need and where cutting points should fall. Calculate total wattage by multiplying the strip’s watts-per-meter rating by your total length. Ensure your power supply can handle this load with 20-30% overhead capacity.
For complex installations requiring multiple segments, plan your power injection points. Long runs may need power connections at both ends or at intervals along the length to prevent voltage drop and maintain consistent brightness
Creative Applications Using Cut LED Strip Lighting
Under-cabinet kitchen lighting often requires precise lengths fitting specific cabinet dimensions. Cutting strips to exact lengths creates professional installations without visible excess. Staircase lighting benefits from individual strips cut for each step, creating uniform illumination.
Accent lighting for architectural features, artwork, or display cases uses custom-cut lengths fitting perfectly in confined spaces. Automotive interior lighting requires precisely cut segments fitting various vehicle dimensions and curves.
Custom furniture builders incorporate LED strip lighting by cutting strips to fit shelving, desks, or bed frames. Event planners and set designers use cut segments to create specific lighting effects for temporary installations
Frequently Asked Questions
Can you cut LED strip lighting to any length? You can cut LED strip lighting only at designated cutting points marked with scissor icons and copper pads. These points appear every 2-4 inches depending on voltage. You cannot achieve absolutely any length, but the frequent cutting points provide substantial flexibility.
What happens if you cut LED strips in the wrong spot? Cutting between designated points permanently damages the LEDs in that segment. The damaged section cannot be repaired and must be cut again at the next proper cutting point, wasting that portion of strip.
Can you reconnect LED strip lighting after cutting? Yes, cut LED strip segments can be reconnected using either soldering for permanent installations or LED strip connectors for easier assembly. Both methods restore electrical continuity when done correctly.
How often can you cut LED strip lighting? You can cut at every designated cutting point along the strip. For 12V strips, this is typically every 3 LEDs (about 2 inches). For 24V strips, it’s every 6 LEDs (about 4 inches).
Do you need special tools to cut LED strips? No special tools are required. Sharp scissors or wire cutters work perfectly. However, reconnecting cut segments may require soldering equipment or LED strip connectors depending on your chosen method.
Can you cut waterproof LED strip lighting? Yes, waterproof LED strips can be cut at designated points, but cutting compromises waterproofing. You must reseal cut ends using silicone sealant, heat-shrink tubing, or waterproof end caps to restore moisture protection.
Will cutting LED strip lighting void the warranty? Cutting at designated cutting points is an intended use that typically doesn’t void warranties. However, cutting at incorrect locations or damage from improper installation generally isn’t covered.
Can RGB LED strips be cut like regular strips? Yes, RGB LED strips can be cut at designated cutting points just like single-color strips. However, they have four copper pads instead of two, making reconnection slightly more complex
Summary
You can cut LED strip lighting, but only at designated cutting points marked with scissor icons and copper pads. These points appear at regular intervals—every 3 LEDs on 12V strips and every 6 LEDs on 24V strips. Cutting anywhere else permanently damages the strip’s electrical circuits.
Successful LED strip cutting requires identifying proper cutting points, using sharp tools for clean cuts, and preserving copper pads for potential reconnection. Cut segments can be rejoined using soldering for permanent installations or connectors for easier assembly.
Different strip types including RGB, RGBW, and waterproof variants can all be cut, though each has unique considerations. Proper planning before cutting ensures you can achieve desired lengths while working within cutting point constraints
Customer Testimonials