Can You Cut LED Strip Lights?
- Home /
- Learning Center /
- Can You Cut LED Strip Lights?
Related products


Can You Cut LED Strip Lights? A Complete Guide to Customizing Your LED Strips
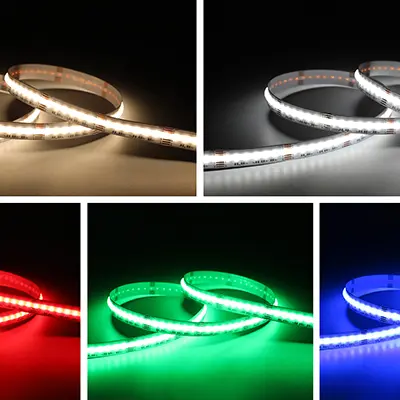
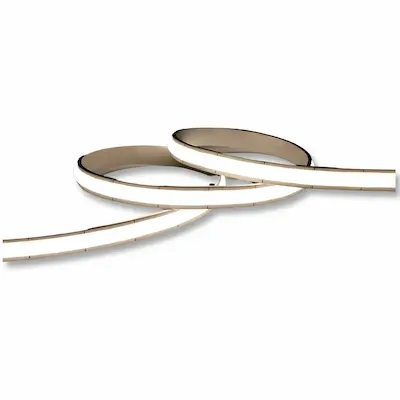
LED strip lights have revolutionized home and commercial lighting, offering flexibility, energy efficiency, and stunning visual effects. One of the most common questions among DIY enthusiasts and professional installers alike is: can you cut LED strip lights? The short answer is yes—but there’s much more to know to do it safely and effectively.
Understanding LED Strip Light Construction
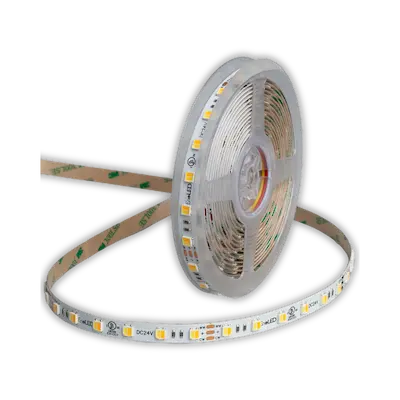
Before diving into the cutting process, it’s essential to understand how LED strip lights are constructed. These versatile lighting solutions consist of small LED chips mounted on a flexible circuit board, typically with an adhesive backing for easy installation.
The key to successfully cutting LED strips lies in their modular design. LED strips are manufactured with designated cutting points, usually marked with scissor icons or copper pads every few inches. These cutting points exist because the LEDs are wired in parallel circuits, creating segments that can function independently when separated.
Where to Cut LED Strip Lights
The most critical aspect of cutting LED strips is identifying the correct cutting points. Never cut your LED strip randomly, as this will damage the circuit and render portions of your strip useless.
Identifying Cut Lines: Look for small copper dots or pads along the strip, typically appearing every 3-6 LEDs depending on the voltage and type. These copper pads are usually accompanied by a scissor icon or a designated cut line. The spacing between cut points varies:
- 12V LED strips: Usually cuttable every 3 LEDs (approximately 2 inches)
- 24V LED strips: Typically cuttable every 6 LEDs (approximately 4 inches)
- Specialized strips may have different intervals
Tools You'll Need
Cutting LED strip lights doesn’t require expensive equipment. Here’s what you’ll need:
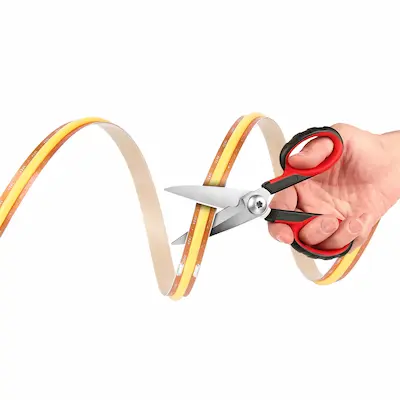
Essential Tools: A sharp pair of scissors or wire cutters works perfectly for clean cuts. Dull blades can damage the circuit board or create jagged edges that complicate reconnection. For professional installations, some electricians prefer precision cutting tools designed specifically for electronics.
Optional Tools for Reconnection: If you plan to reconnect cut segments, you’ll also need soldering equipment or LED strip connectors, depending on your chosen connection method.
Step-by-Step Cutting Process
Cutting LED strip lights is straightforward when you follow the proper procedure. First, measure the length you need for your installation. Remember that you can only cut at designated points, so you may need to adjust your measurement slightly to align with a cut line.
Before cutting, always disconnect the LED strip from its power source. This prevents electrical shock and protects both you and the strip from potential damage. Once unplugged, identify the nearest cutting point to your desired length.
Position your scissors or cutting tool perpendicular to the strip, centered on the copper pads at the cutting line. Make one clean, straight cut through the entire width of the strip. Avoid sawing or multiple cuts, as this can damage the copper contacts needed for reconnection.
After cutting, inspect the copper pads to ensure they remain intact and free from damage. These pads are essential if you plan to reconnect the strip or add connectors.
What Happens After You Cut
Once you’ve cut your LED strip, each segment becomes an independent lighting unit. The segment connected to the original power connector will work immediately when plugged in. However, any disconnected segments will need their own power connection to function.
This is where many DIYers encounter challenges. You cannot simply connect cut segments back together without proper electrical connections. The copper pads at the cutting points serve as connection terminals, allowing you to either solder wires or use specialized connectors to restore functionality.
Reconnecting Cut LED Strips
There are two primary methods for reconnecting cut LED strip segments: soldering and using connectors.
Soldering Method: Soldering provides the most reliable and permanent connection. This method involves attaching wires to the copper pads of each strip segment and connecting them to maintain the electrical circuit. While soldering requires some skill and equipment, it creates waterproof, secure connections ideal for permanent installations.
To solder LED strips, tin the copper pads with a small amount of solder, then attach insulated wires to each pad (positive and negative). Connect the corresponding wires from each segment, ensuring proper polarity alignment.
Connector Method: LED strip connectors offer a solderless alternative perfect for beginners or temporary installations. These plastic connectors feature metal contacts that grip the copper pads when you insert the strip. Available in various configurations—including straight connectors, corner connectors, and T-connectors—they provide flexibility for complex layouts.
While connectors are easier to use, they’re generally less reliable than soldered connections and may not be waterproof, making them unsuitable for outdoor or humid environments.
Common Mistakes to Avoid
Even experienced installers sometimes make errors when cutting LED strips. Understanding these common mistakes helps ensure successful results.
Cutting Between Designated Points: This is the most frequent and costly mistake. Cutting anywhere except the marked cutting points damages the circuit, creating dead LEDs that won’t illuminate. Always double-check that you’re cutting exactly on the copper pads.
Ignoring Voltage Requirements: Different LED strip segments require specific voltages. Mixing 12V and 24V strips or connecting them to incorrect power supplies can cause immediate failure or create fire hazards.
Forgetting Polarity: When reconnecting strips, maintaining correct polarity (positive to positive, negative to negative) is crucial. Reversed polarity won’t damage most modern LED strips due to built-in protection, but the lights simply won’t work.
Waterproofing Cut LED Strips
If your LED strips were originally waterproof (rated IP65, IP67, or IP68), cutting them exposes the circuit board and compromises this protection. The cut ends become vulnerable to moisture damage.
To restore waterproofing, you’ll need to seal the cut ends. Silicone sealant works well for basic protection, while heat-shrink tubing provides more robust weatherproofing. For professional outdoor installations, specialized waterproof end caps and connectors are available that maintain the original IP rating.
Applications for Cut LED Strips
The ability to cut LED strips opens up countless creative possibilities. Under-cabinet lighting often requires precise lengths to fit specific cabinet dimensions. Accent lighting for architectural features, display cases, and artwork benefits from custom-sized strips that fit perfectly without excess length.
Automotive enthusiasts use cut LED strips for interior accent lighting, fitting them into tight spaces and curves. Event planners and set designers rely on customized LED strips to create specific lighting effects for temporary installations.
Safety Considerations
While cutting LED strips is generally safe, certain precautions ensure both personal safety and optimal results. Always work with the power disconnected—never attempt to cut energized LED strips. The low voltage of most LED strips (12V or 24V) poses minimal shock risk, but working with live electricity is unnecessary and dangerous.
Ensure your work area is clean and well-lit to see the cutting points clearly. Keep cut strips away from water until properly waterproofed, and never exceed the maximum recommended run length for your specific strip, as this can cause overheating and premature failure.
Frequently Asked Questions
Can I reconnect LED strip lights after cutting them?
Yes, you can reconnect LED strip lights after cutting them using either soldering or LED strip connectors. Soldering provides a more permanent and reliable connection, while connectors offer a simpler, tool-free solution suitable for most applications.
Will cutting LED strips void the warranty?
Most manufacturers expect users to cut their LED strips at designated cutting points, and this typically doesn’t void warranties. However, cutting at incorrect locations or improper installation that causes damage generally isn’t covered. Always check your specific product’s warranty terms.
How many times can I cut an LED strip?
You can cut an LED strip as many times as needed, provided you cut only at the designated cutting points. Each cut creates independent segments that can function separately or be reconnected. However, remember that each segment requires its own power connection.
Can all LED strips be cut?
The vast majority of LED strips are designed to be cut, but there are rare exceptions. Specialized LED strips with integrated circuits or specific continuous patterns may not have cutting points. Always check the manufacturer’s specifications before purchasing if cutting capability is essential.
What’s the minimum length I can cut an LED strip to?
The minimum length depends on your strip’s voltage and design. For 12V strips, the minimum is typically one cutting segment (usually 3 LEDs or about 2 inches). For 24V strips, it’s generally 6 LEDs or approximately 4 inches. You cannot cut shorter than one complete segment.
Can I cut RGB or color-changing LED strips?
Yes, RGB and color-changing LED strips can be cut at designated points just like single-color strips. However, reconnecting them requires more connections—typically four wires (red, green, blue, and common) instead of two. Ensure you use connectors or soldering techniques designed for RGB strips.
Do I need special tools to cut LED strips?
No special tools are required. Regular scissors or wire cutters work perfectly for cutting LED strips. However, for reconnecting cut segments, you may need soldering equipment or LED strip connectors depending on your chosen connection method.
Can I use cut LED strip pieces for different projects?
Absolutely! Cut LED strip segments are perfect for smaller projects or installations with specific length requirements. As long as you provide appropriate power to each segment, they function independently and can be used anywhere.
Summary
Cutting LED strip lights is not only possible but is actually an intended feature of their design. The key to success lies in cutting only at designated cutting points marked with copper pads and scissor icons. These cutting points exist because LED strips are constructed in modular segments that can function independently.
To cut LED strips safely, you need only basic tools: sharp scissors or wire cutters. Always disconnect power before cutting, make clean cuts directly on the marked lines, and ensure the copper pads remain intact for future connections.
After cutting, segments can be reconnected using either soldering for permanent installations or connectors for easier, tool-free solutions. Whether you choose soldering or connectors depends on your skill level, the installation environment, and whether the connection needs to be waterproof.
Understanding voltage requirements, maintaining proper polarity, and avoiding cuts between designated points are essential for successful LED strip customization. With proper technique, cutting LED strips opens up endless creative possibilities for both residential and commercial lighting applications.
The flexibility to customize LED strip lengths makes them ideal for countless projects, from under-cabinet lighting to automotive accents. By following the guidelines in this article, you can confidently cut and customize LED strips for any application while maintaining safety and functionality.
Customer Testimonials