Can you cut RGB LED strip lights
- Home /
- Learning Center /
- Can you cut RGB LED strip lights
LED Tape Lights
MaxCut COB Series

UniBasic COB Series


UniPlus COB Series


UniTape Distributors Display

Glow67 IP67 Series

UniColor COB Series


CCTPlus Tunable White

Can You Cut RGB LED Strip Lights? Complete Guide to Customizing Color-Changing Strips
RGB LED strip lights have revolutionized decorative and accent lighting, offering millions of color combinations and dynamic effects that transform any space. One of the most common questions when planning RGB LED installations is: can you cut RGB LED strip lights? The answer is yes—but with important considerations unique to RGB strips. Understanding where and how to cut RGB strips, along with the complexities of reconnecting them, ensures successful installations that deliver stunning color-changing effects without costly mistakes.
Understanding RGB LED Strip Lights
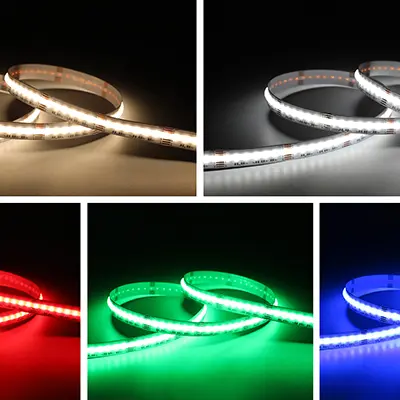
RGB LED strip lights differ from single-color white LED strips in their construction and electrical requirements. Each segment of an RGB strip contains three separate LED chips—red, green, and blue—that can be individually controlled to create virtually any color in the visible spectrum by mixing different intensities of each primary color.
This more complex construction means RGB strips have additional electrical requirements. Instead of two electrical connections (positive and negative), RGB strips require four connections: one for each color channel (red, green, blue) plus a common connection (typically common positive or common negative depending on the strip design).
Despite this added complexity, RGB LED strips are designed to be cut just like single-color strips—but only at designated cutting points. The fundamental principle remains: cutting at marked locations is safe and intended by manufacturers, while cutting elsewhere permanently damages the circuit
Can You Cut RGB LED Strip Lights?
Yes, you can absolutely cut RGB LED strip lights, but you must cut only at designated cutting points marked along the strip. These cutting points appear at regular intervals and are specifically designed to allow customization while maintaining full functionality of all color channels.
The ability to cut RGB strips is essential for practical installations. Few spaces perfectly match standard 16-foot reel lengths, and the flexibility to customize lengths makes RGB strips adaptable to virtually any application.
However, cutting RGB strips at incorrect locations has catastrophic consequences: permanent damage to the electrical circuit, non-functional LED segments that cannot be repaired, and wasted material. The key difference with RGB strips is that improper cutting damages three separate color channels simultaneously, potentially creating complex failure modes where some colors work while others don’t
Identifying Cutting Points on RGB LED Strips
RGB LED strips feature scissor icons printed directly on the strip at each cutting point, just like single-color strips. These unmistakable symbols provide clear visual guidance showing exactly where you can safely cut.
The key difference is the copper pads at cutting points. Instead of two copper pads, RGB strips have four copper pads at each cutting point. These pads are typically labeled or color-coded to indicate their function: R (red), G (green), B (blue), and either + or – for the common connection.
Cutting Point Spacing:
12V RGB strips typically allow cutting every 3 LED segments, translating to approximately 2 inches (5 centimeters) between cutting points. Each “LED segment” on an RGB strip actually contains three individual LED chips (red, green, blue).
24V RGB strips usually have cutting points every 6 LED segments, roughly 4 inches (10 centimeters) apart
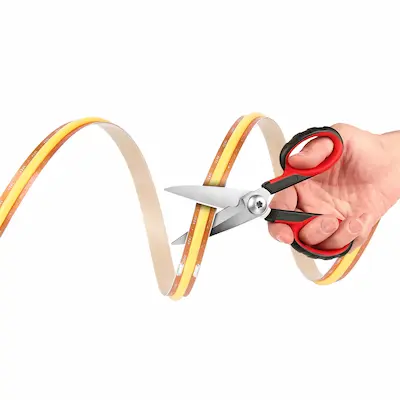
How to Cut RGB LED Strip Lights
Preparation: Before cutting, measure your installation area carefully and identify the nearest cutting point to your desired length. Remember that you can only cut at designated points marked with scissor icons and four copper pads.
Plan your installation considering how you’ll reconnect segments if necessary. RGB strips require more complex reconnection than single-color strips due to the four electrical connections.
Always disconnect the RGB strip from power before cutting.
Cutting Technique: Use sharp scissors or precision wire cutters for clean cuts. Dull blades can damage the circuit board or crush the copper pads, which are even more critical on RGB strips where you have four pads to preserve instead of two.
Position your cutting tool perpendicular to the strip, centered directly on the four copper pads at the designated cutting line. Make one clean, decisive cut straight through the entire width of the strip.
Post-Cut Inspection: After cutting, examine all four copper pads on both cut ends carefully. They should all be clean, smooth, and fully intact. With four pads instead of two, there’s greater risk that at least one pad might be damaged during cutting.
If any pad is damaged, you’ll need to cut again at the next designated cutting point. A single damaged pad can prevent one entire color channel from working, resulting in strips that can only display limited colors
What Happens If You Cut RGB Strips in the Wrong Place
Cutting RGB LED strips between designated cutting points causes the same fundamental problem as with single-color strips, but with potentially more complex failure modes.
When you sever the electrical pathways within an LED segment, you disable that segment’s LEDs. For 12V RGB strips, cutting incorrectly destroys at least three LED segments (nine individual LED chips). For 24V strips, you lose six segments (eighteen individual LED chips).
RGB strips can exhibit more varied failure patterns. Depending on exactly where you cut, you might damage only some color channels while leaving others functional. This creates confusing situations where damaged segments might display some colors but not others.
The damaged sections cannot be repaired. Your only option is cutting again at the next proper cutting point
Reconnecting Cut RGB LED Strip Lights
Soldering Method: Soldering provides the most reliable connection for RGB strips. The process follows the same principles as single-color strips but requires careful attention to ensure all four connections are made correctly.
You’ll need a fine-tip soldering iron, quality rosin-core solder, and four-conductor cable or four separate insulated wires with different colors for easy identification (red, green, blue, and black or white for common).
The process involves tinning all four copper pads on each segment, attaching four wires to the four pads on each segment (carefully noting which wire connects to which pad), and connecting corresponding wires: red to red, green to green, blue to blue, and common to common.
Proper wire identification is crucial. Mixing up connections prevents proper color display—the strip might show wrong colors, fail to mix colors correctly, or display only some colors.
Connector Method: RGB LED strip connectors offer a solderless alternative, but they’re more complex than connectors for single-color strips due to the four connection points.
RGB-specific connectors feature four spring-loaded or clamping contacts that must align precisely with the four copper pads on the strip. The connectors are typically labeled or color-coded to help ensure correct alignment.
To use RGB connectors, open the connector housing, insert the cut strip end ensuring all four copper pads align perfectly with the connector’s four metal contacts, and close the housing. Verify the alignment carefully—misalignment causes wrong color display.
RGB connectors come in various configurations: straight connectors, L-shaped connectors, T-connectors, and wire connectors.
While RGB connectors are easier than soldering, they require more precision due to the four alignment points instead of two
Special Considerations for RGB Strips
RGBW and RGBWW Strips: RGBW strips add a dedicated white LED chip, resulting in five copper pads at cutting points (red, green, blue, white, and common). RGBWW strips may have six pads.
These strips can be cut at designated points, but reconnection complexity increases dramatically. You need five-conductor or six-conductor cable and must manage five or six connections perfectly.
Waterproof RGB Strips: RGB strips with waterproof ratings have protective coatings that must be resealed after cutting. Apply silicone sealant, use heat-shrink tubing, or install waterproof end caps.
Reconnecting waterproof RGB strips while maintaining waterproofing is significantly more challenging due to the four connections requiring sealing.
Addressable RGB Strips: Addressable RGB strips contain integrated circuits allowing individual LED control. These strips can typically be cut at designated points, but they require data connections in addition to power connections, making reconnection even more complex
Power Considerations for Cut RGB Strips
RGB LED strips consume more power than equivalent single-color white strips because they’re powering three separate LED channels.
Power Supply Sizing: Calculate total power requirements by multiplying the strip’s watts per foot rating by your total length. RGB strips typically consume 50-100% more power than equivalent white strips. Ensure your power supply can handle the total load with 20-30% overhead capacity.
Voltage Drop: RGB strips are more susceptible to voltage drop issues because they draw higher current. Implement power injection more aggressively—every 10-13 feet for 12V RGB strips and every 20-26 feet for 24V RGB strips.
Voltage drop in RGB strips can create color shifting where the strip appears a different color at the far end than at the beginning
Controller Compatibility
After cutting and potentially reconnecting RGB LED strips, ensure your RGB controller can handle the total length and power requirements.
Most RGB controllers specify maximum load capacity in watts or amps. Verify your cut and connected segments don’t exceed this capacity. If they do, you’ll need multiple controllers or amplifiers.
When reconnecting cut RGB segments, ensure all segments remain properly connected to the controller with correct polarity for all four channels
Frequently Asked Questions
Can you cut RGB LED strip lights to any length? No, you can only cut RGB LED strip lights at designated cutting points marked with scissor icons and four copper pads. These appear every 2-4 inches depending on voltage.
What happens if you cut RGB strips in the wrong place? Cutting between designated points permanently damages the circuit, disabling multiple LED segments. You might lose all three color channels or experience partial failures where only some colors work.
How do you reconnect RGB LED strips after cutting? Reconnect using either soldering (connecting four wires to the four copper pads) or RGB-specific connectors with four connection points. Both methods require careful attention to ensure all four channels connect correctly.
Are RGB strips harder to cut than white LED strips? The physical cutting process is identical, but RGB strips have four copper pads instead of two, requiring more precision. Reconnecting is significantly more complex due to managing four electrical connections.
Do RGB LED strips consume more power than white strips? Yes, RGB strips typically consume 50-100% more power than equivalent white strips because they power three separate color channels.
Can you cut RGBW LED strips the same way as RGB strips? Yes, RGBW strips can be cut at designated points, but they have five copper pads instead of four (adding white to red, green, blue, and common). Reconnection requires five connections.
How many times can you cut an RGB LED strip? You can cut at every designated cutting point along the strip—as many times as needed.
Will cutting RGB strips affect color accuracy? Cutting at proper points doesn’t affect color accuracy. However, improper cutting or incorrect reconnection can cause color display problems
Summary
You can cut RGB LED strip lights, but only at designated cutting points marked with scissor icons and four copper pads (red, green, blue, and common). These cutting points appear every 2-4 inches depending on voltage.
The physical cutting process mirrors single-color strips—use sharp tools, cut precisely at marked points, and preserve all copper pads. However, RGB strips require more careful attention due to four electrical connections instead of two.
Reconnecting cut RGB strips is more complex than single-color strips. Soldering provides reliable permanent connections but requires managing four wires correctly. RGB connectors offer easier installation but demand precise four-point alignment.
RGB strips consume more power than white strips and are more susceptible to voltage drop, requiring more aggressive power injection strategies. Proper planning before cutting ensures successful installations
Customer Testimonials